Showing posts with label Food on the Road. Show all posts

Monday, December 21, 2015

Storing a Month’s Worth of Food in an RV

Storing a month's worth of food for a family of five in a thirty foot rv. RVing with the RakisLiving in an RV with limited storage, you have to prioritize what you have space for and what you don’t. With three growing boys, food storage is high on our priority list. Big grocery store trips happen once a month in order to cut down on impulse buys. Although we do have to restock on milk, eggs, cheese and fresh fruits and vegetables at least once a week, we stock up on dried and frozen goods so we don’t have as many trips to the grocery store.

In order to understand the food we buy, you should know something about the meals we eat. I cook two to three meals every day. Dinner is almost always home cooked, as close to from scratch as I can get it. Lunch is sometimes home cooked, sometimes “quick fix” like frozen raviolis or hot dogs and baked beans. And sometimes we have leftovers for lunch, although lately we haven’t had much leftovers as the boys eat more and more at each meal. Breakfast is home cooked at least twice a week: pancakes, waffles, biscuits, etc. The rest of the time we eat cereal, oatmeal, or peanut butter sandwiches.  In between meals my kids snack, a lot. I try to keep the snacks healthy - pretzles, fruit, etc. but we also do homebaked cookies, homemade granola bars, and I have one who likes to eat up our leftovers for snacks. 

For dinners, I plan out our meals 5 weeks ahead of time using a chart like this:

Meal planning and storing a month's worth of food for a family of five in a thirty foot rv. RVing with the Rakis

This helps to make sure we have variety in our meals, and I can balance how many meals we are eating that contain meat or beans or cheese or whatnot. I use the meal plan to plan my grocery list so that I'm not buying things I don't need. This saves on storage and on money! We spend about $500 a month on food.

Once I make the list, we do big grocery shopping and bring home the food to store. This was much easier when we were in a house or apartment, but we have made it work well in our RV by being creative and prioritizing food storage as needing more space than other things.

So, where do I put all of the food I buy? Well my husband has done a bunch of work to make sure that we had enough room for the amount of food we need. He has removed drawers, built shelves, added doors and more.

Here’s a peek at our food storage:


We have a regular RV fridge which holds quite a bit of food, although it's not very deep. It has a freezer attached to the top which is where we store vegetables, butter, broths and anything non-meat that needs to be stored.

Storing a month's worth of food for a family of five in a thirty foot rv. RVing with the Rakis

Storing a month's worth of food for a family of five in a thirty foot rv. RVing with the Rakis


My husband installed an extra mini fridge that is dedicated to meat. We fill it once a month, and usually have some meat left at the end of the month since we only eat meat two to three times a week.

Storing a month's worth of food for a family of five in a thirty foot rv. RVing with the Rakis


Underneath the regular RV fridge, my husband removed a drawer and opened up a storage space which he just added doors too. This gives us room for potatoes, onions, cooking oil, extra boxed items and the all important wine. (We collect local wines in the different places we visit. So far Michigan held our favorite wines, but that's a whole seperate post!)

Storing a month's worth of food for a family of five in a thirty foot rv. RVing with the Rakis


Next to the refrigerator was once a closet. When we bought the RV, my husband took out the hanging bar and added shelves, making me a pantry with three deep shelves. The shelves are so deep that we have a box in the back of the bottom one to hold canned goods.

Storing a month's worth of food for a family of five in a thirty foot rv. RVing with the Rakis


Under the pantry was once two drawers. My husband took out the bottom drawer and realized there was a lot of extra space underneath it. So he took out some paneling and built me two additional shelves with a door. On these two deep shelves, we use large totes to store beans, four and rice. My flour and rice containers can each hold about 20 pounds of material, giving me plenty of room to stock up. 

Storing a month's worth of food for a family of five in a thirty foot rv. RVing with the Rakis

Storing a month's worth of food for a family of five in a thirty foot rv. RVing with the Rakis


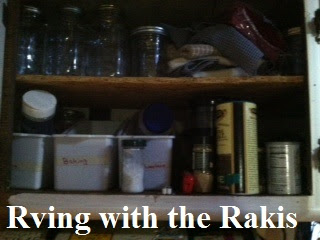
Above my stove was once a microwave. When we had been in the RV for two months we realized that we had only used the microwave one time and that it was taking up a lot of space. So my husband removed it and built doors and added an additional shelf to make more storage space. The top shelf holds canning jars and kitchen towels. The bottom shelf holds common cooking and baking needs like baking powder, yeast, powdered milk, salt and pepper.

Storing a month's worth of food for a family of five in a thirty foot rv. RVing with the Rakis


Spices were a huge space issue for us. We tried multiple solutions and eventually my husband built me a spice cabinet with three shelves and a door. The cabinet is right next to the stove, so it is very convenient for cooking.

Storing a month's worth of food for a family of five in a thirty foot rv. RVing with the Rakis


So that is how we store a month's worth of food in our 30 foot Class A RV with no slides. I showcased this storage in our interview and RV tour with Follow the Hearts, so feel free to check out that video too.


Monday, September 22, 2014

Wheat Bread – Finally a Success!

There’s nothing like fresh baked bread, and since we’ve left the land of delicious, freshly baked bread available at every store or bakery for just pennies (A.K.A Morocco), I’ve been playing around with my bread recipe.  The arrival of my KitchenAid Mixer helped to speed this process along, as I don’t have to take days off of kneading to let my tendinitis heal.

Homemade Wheat Bread Recipe

Last week, while doing a search on different bread recipes, I read that 2 tablespoons of wheat gluten will help the bread to be less dense – which has always been a problem with my bread.  So, off I went to the grocery store to buy a bag of wheat gluten.  $8 for a bag – wowzers, but with only 2 tablespoons needed, I shouldn’t have to buy it that often.  Even if I do, it truly makes all of the difference.


This week, our bread turned out so good, that we ended up going through an entire batch in one day and I had to bake more the next day!  Luckily, it’s a nice easy recipe:


Put 2 cups of luke warm water into the KitchenAid Mixer bowl (or a regular old mixing bowl) with 2 tablespoons of sugar (or 1/4 cup of honey) and 2 tablespoons of dried yeast.  Let this set for about 15 minutes, to “proof” the yeast.


Next, add 4 cups of white flour and 2 teaspoons of salt.  Knead with the dough hook (or a good old wooden spoon), and let sit for 30 – 45 minutes.  The mixture will rise quite a bit as the yeast activates.

Homemade Wheat Bread Recipe

Now we add the wheat gluten – two heaping tablespoons, as well as 4 cups of whole wheat flour.  I also had about 1/4 of a cup of milk, as yeast LOVES milk and this increases the fluffiness of your bread too.  Knead with the bread hook attachment (or by hand if you don’t suffer from tendinitis) until the dough comes together and there is no flour left in the bowl.


Time to let the bread rise!  If you’re using the Kitchen Aid, you need to take the dough OUT of the mixer bowl.  You can oil the mixer bowl and put it back in there to rise if you’d like, but be sure to add a tablespoon of oil, or the dough will stick to the side and you will lose your air pouch when you remove the bread – making for a much harder, denser bread.  I prefer to use my large, stainless steel Pampered Chef mixing bowls, because the size is just perfect for rising dough.  Cover the bowl with a towel to keep the flies away and place in the sunshine if you can – this will cut down on rising time.  If there’s no sunshine, just pick a dry, warm spot and the bread will rise in no time. 

Warning – don’t let your dough rise on the stove if you’re cooking on the stove.  I had a whole bowl of dough “bake” in the bowl on my because my lovely Stainless Steel Bowl got too warm!

Homemade Wheat Bread Recipe

Once the bread dough has at least doubled in size (generally 1 – 2 hours), punch the bread down with your hands and form it into the types of loaves you want.  I generally make one “sandwich loaf” in my Pampered Chef Stoneware Bread Pan and then make the rest into round, Moroccan style loaves.  I can get 2 – 3 small rounds or 1 large round out of the remaining bread.  (In the picture below, I didn’t make a sandwich loaf.) Once the loaves are made, leave them to rise again.  I leave mine to rise right on the pans I cook them on.  I even put them in the oven while they rise, which saves me from having to jostle them too much or even cover them with a towel!  Of course, if it’s a warm, sunny day, the bread will rise faster in the sun.

If you are needing to move your loaves before you bake them – be sure to put them on a cotton sheet where you won’t break an air pocket if you move them.  (My Moroccan mother – in – law taught me this trick and it makes all the difference!)

  Homemade Wheat Bread Recipe


After the bread has risen four about 45 minutes, it should be the right size to bake.  Bake at 375 degrees for 15 – 20 minutes, depending on the size of your loaf, or until the loaf is golden brown.  If you want a more golden crust – coat the crust with an egg white or a few tablespoons of melted butter right before you bake.

Heidi Raki of Raki's Rad Resources

Wednesday, August 6, 2014

Peaches, Peaches and More Peaches!!!!

We landed in Georgia just in time for peach picking season!  We’ve been peach picking before, and knowing we had enough time at my aunt’s place to do some preserves, we went a little peach crazy!  We filled three 20 gallon buckets with peaches (and then ended up going back for an additional bucket!), as well as 3 pounds of blueberries.


In addition to eating fresh peaches with every meal, we had blueberry muffins, peach muffins and peach cobbler.  And then we began preserving.

 Picking and preserving fruit is the best way to continue to eat locally in the winter.Peach preserves, peach halves, peach salsa and peach butter – all in large quantities to help us get through the winter when there is little local fresh fruit available!  Here is a look at just a fraction of what we preserved:

Picking and preserving fruit is the best way to continue to eat locally in the winter.


Preserving peaches is not too hard.  The hardest part is that you need to remove the skin, but the easiest trick is to throw them in a big pot, cover with water and bring to a boil.  Then let them sit in the warm water until the water cools.  This blanching technique makes the skin slide ride off of a ripe peach and makes less peaches much easier to peel.  Once the peaches have their skins off, it just depends on what you want to do with them.


Picking and preserving fruit is the best way to continue to eat locally in the winter. Our peach halves simply got covered with “simple syrup” a combination of 1 part sugar, 3 parts water that has come to a boil.


Picking and preserving fruit is the best way to continue to eat locally in the winter. The peach preserves were simply hand squished, combined with sugar and boiled to the right consistency.


Picking and preserving fruit is the best way to continue to eat locally in the winter. For the peach salsa, we used this recipe:

13 – 15 peaches (diced small)

8 – 10 tomatoes (diced small)

3 – 5 green peppers (diced small)

1 onion (diced small)

1 cup of lemon juice

salt & pepper to taste


Picking and preserving fruit is the best way to continue to eat locally in the winter. For peach butter, we used a full crockpot of peaches – blanched, peeled and squished with 4 cups of sugar, cinnamon and pumpkin pie spices.  Leave it in the crockpot on high for 5 hours or on low overnight, and then either blend or use a mixer to get the right consistency.


All of our peach recipes were canned in a simple hot water bath for 15 minutes. 


Picking and preserving fruit is the best way to continue to eat locally in the winter.The blueberries were easier, they simply get thrown into a baggie and stuck in the freezer.


Now we can’t wait for apple season!

signature 

Wednesday, July 9, 2014

Grilling Out at Rest Stops

Before we bought our RV, we did quite a bit of traveling, usually in a mini van with a tent and a cooler in the trunk.  With three growing boys to feed, it’s far too expensive for us to eat out every meal.  In fact, we rarely eat out while we are traveling.  Instead, we cook quite regularly, and don’t choose to live off of sandwiches.  Even though our RV comes completely equipped with a stove and microwave, we are sticking with our roots and using a little propane grill, which sits nicely on the picnic tables at any local rest stop.  Here is one of the grill meals we had this week:


Grilling some fish and vegetables at the local rest stop is a quick and delicious way to save some money on a road trip.  RVing with the Raki's

We grilled fish, zucchini and summer squash (straight from the farm stand), tomatoes (also from the farm stand) and mushrooms.  Everything got a good shake in a ziploc bag with olive oil, salt and pepper before going onto the grill.   Layer it up on a piece of wheat bread with some cheddar cheese and Khalil’s homemade black bean and corn salsa, and it was delicious!


Grilling some fish and vegetables at the local rest stop is a quick and delicious way to save some money on a road trip. Fish, zucchini, squash, tomatoes and mushrooms RVing with the Raki's

We also had some juicy canteloupe for desert, but the pigs, I mean the boys, scarfed it all down before I could get a picture.

What is your favorite thing to put on the grill?


signature